Hello, and welcome in my Learning Journal for the AdobeGenPro Video Course. It's now a reverse Learning Journal, so you can read first my thoughts about my last assignment. Thanks to Karen Drom for the idea !
Here we are. I've just finished the Digital Video Course today and one more time, that was a great experience with the Adobe Education Exchange Platform.
As a student it's very efficient to experiment the « Best Classroom pratices » promoted by the team. I can't say these principles were new to me, but I found very useful to work for these assignments in order to make these principles more obvious.
1. Planning and preparation.
I felt the necessity to write scripts, to draw storyboards, to anticipate what I would have to say or to show on screen. I think this necessity is based on the subjects of the assignments.
2. Clear learning objectives for all your students.
I really appreciate the differenciation proposed for the assignments. As I'm not a novice in video, I tried to accomplish all the « Advanced » proposals, which was really motivating.
3. Simple and skillful demonstrations.
This is certainly something I realized during this course. Too often we want to explain and explain again the same things. Digital learning is making it short. Someone can catch what you explain at the first view. Why do you want to bore him ? He can watch again if needed.
4. Time to experiment, and time to fail as well as succeed.
I experimented a lot during this course : video FX, sound design, motion graphics. Some of these experimentations could have been improved, but I'm rather proud of my final assignment and my first attempt at creating an Essential Graphic Title.
5. Collaboration.
I really enjoyed the live classes and the way each one can ask a question, answer or simply give a link. I really appreciate the demos made by Matthijs and how he takes care about his students. The AdobeGenPro facebook page is also a good place to collaborate. I'm not into Twitter that much. Sorry.
6. Make it fun.
I hope some of my assignments were that fun. I always try to add some fun in my real classroom. This is all the more important considering digital course to create this interaction with your audience.
I'll try to keep on applying these principles in my own classroom practice.
Personally, every Adobe Course is a good way to make me practice English Language. I hope you could understand what I wrote in this Learning Journal and what I'm saying right now.
Now it's time to look for another learning challenge.
See you.!
For this last "technical" assignment, the goal was to make a screen capture to teach something. I tried to integrate other shots using the technique I was showing to grab the attention. I also played around with After Effects ans the Essential Graphics panel to build something like an intro that I would be able to easily re-use later. 90 seconds was a real challenge but making it short is so important !
Screen Capture
First of all, I wrote a script in French for this tutorial and then translated it in English.
For the screen capture I used Camtasia because of the options it proposes (easy zooming, webcam capture...). I didn't know exactly what I would need. I wanted to have all the opportunities. Finally, I could have used VLC and animate the screen capture directly in Premiere. I didn't use the webcam and needed to speed up some portions of the clip.
I recorded a voice over directly in Premiere Pro with a Shure dynamic microphone as Jack explained in his Class 5 assignment (Thank you, Jack !) :
I made a lot of takes to obtain something fluent enough. I cut and adjust the speed of some portions to get an exactly 60 seconds demo.
The clip used in my tutorial comes from pexels.com.
Me, myself and I
I shot some clips of me talking for the intro and the outro with my Canon 600D and sync the audio with my Zoom H4 Pro. It was on the table, near the computer, but I made my frame to hide it.
Essential Graphics
For the titlings, I played with the Essential Graphics panel. I quickly added the default Lower third to introduce myself and spend a lot of time in After Effects to create the intro. I really enjoy animating motion graphics like that! It's 10 seconds long but there's a lot of work in it!
I decided to make a template with it to be able to re-use this work in the future and to customize it easily. So exciting to think about how to make an English and a french version : I created a Null object with 2 checkbox expression controllers, then use an expression for the Y position of the 2 layer texts linked to this checkbox. Pretty tricky, but it works!
Here it is in Premiere Pro, ready to be customized...
I also duplicated the chrono comp and made some adjustments to create the countdown you can see during the screen capture.
The final touch
I tried to add a bit of fun in the outro, adding those censor bleeps and animating a mask to blur my mouth as it can been seen in some U.S. TV shows. I'll probably make a "30 seconds to learn" episode to show you how to add these f******g beeps ;-).
For this cut-on-action assignment, it took me some days to find the idea. I wanted to do something funnier, but finally I made something simple. I used a mix of the two techniques of shooting a scene with one camera explained in this video made by cinecom.
Here is how I blocked the scene, with SHOT DESIGNER by hollywoodcameraworks.com. That was my first attempt with this app that I found very useful.
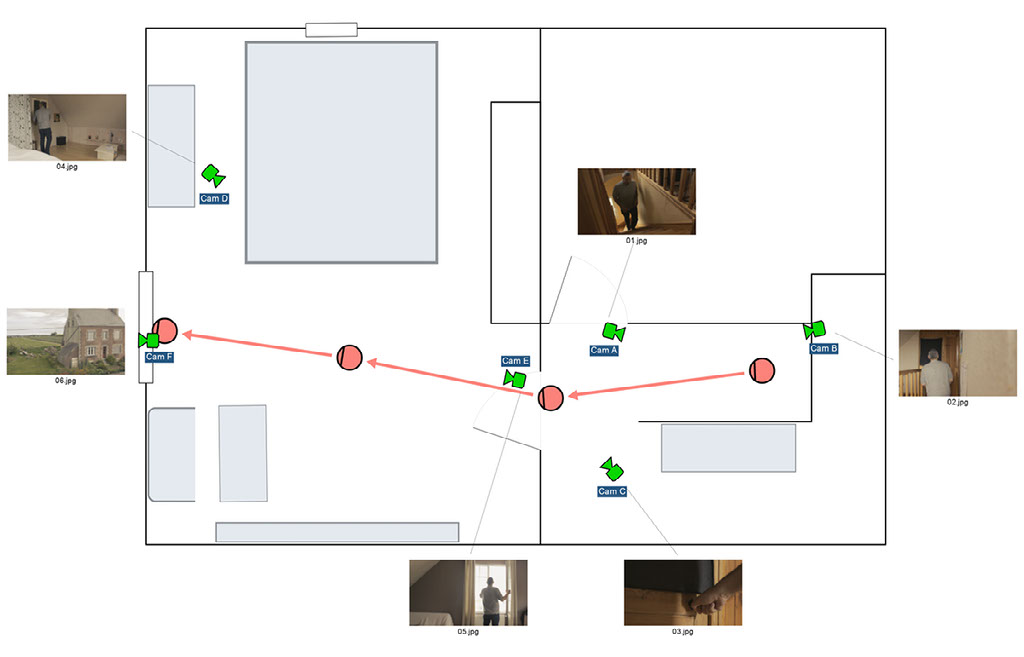
Using Illustrator and Photoshop to create the elements needed (as the background or storyboard images) can allow you to obtain something useful and pretty ! Moreover, you can animate the scene and add simulate the movements of the characters and cameras. Definitely a good tool !
I hadn't got so much time to film and edit and my environment was noisy because of the presence of some craftsmen downstairs... I shot the scene without recording the sound (that wasn't intentional, I forgot to reassign the internal microphone as the recording source and didn't plug in my Zoom H4 !).
I recreated the sound of the scene with some sound FX from freesound.org and mix them with a piece of music.
I didn't encountered difficulties while editing this short piece. That wasn't the first time I had to cut on action. Here is a short movie I made for a friend of mine who creates upcycled objects. I used this technique several times in it.
Everytime you cut on action, you have to think about rythm. Sometimes because you want a natural feeling, sometimes because you want to express something like an "emergency feeling"...
Pre-production
For this assignment, I had to write the script first and repeat it to have an idea of the duration of the video. As a non-native speaker, it wasn't that easy to find the idea. I read a lot of jokes on the internet, choose two of them from there and add my final touch, playing with the fact I would play both characters as Kev and Matthijs did! Here is the storyboard I ended with :
18 shots for a 30 seconds movie is probably too much!
Production
I played with the thirds rule and symetry (I love these shots "à la Wes Anderson") in the storyboard and always keep an eye on it when shooting. I got some issues with the DOF and got some shots out of focus, even if I used some objects to adjust it before shooting.
There was a carpet on the floor to help me with the 180° rule. I used the diagonal of this carpet as a reference to place my camera.
That wasn't so easy to act, shoot, refer to the stoyboard all alone !
Post-Production
I liked the first idea to install the situation. I shot it and edited it a bit differently, using L and J cuts to keep the flow as natural as possible.
I used the masking technique to be twice on screen (3 shots) and had to adjust luminosity to get the two shots matching...
I ended with a 34 seconds-long movie after the first edit and then, cut and cut again to get a 30 seconds-long result.
I finally added a dramatic atmosphere on the last shots and colour-graded the montage to get this quite cinematic feeling.
Hope you enjoy !
For this class, it took me a long time to decide what to do. I wanted to complete the advanced assignment and shoot my own footage. I needed to plan : preproduction is the key ! I thought about different themes : music, reading, writing and finally choosed the last one.
I played with the meaning of writing : with a pen, a reed, on a tablet, on screen... I could have added a hard drive LED too ;-)
We're about to move to Morocco in August, that's the reason why you can read some arabic words in the video. The whole family is learning this language and I'm practicing calligraphy.
Unfortunately, I encountered technical issues and I wasn't able to work on sound as I wanted. Therefore the escalation is based upon frame values and clips length. You can notice that I made some changes while shooting and editing. The storyboard is really important but sometimes you have to escape from it !
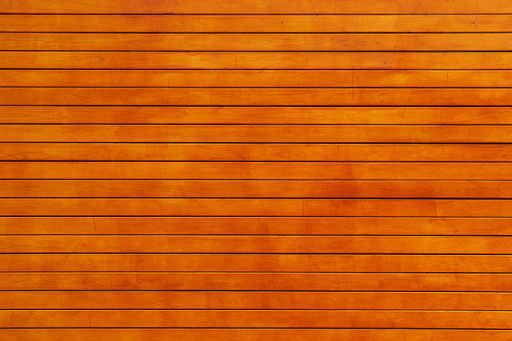
First off all, I visited pexels.com and searched for orange photos and selected 9 of them. I downloaded some of them at full resolution to be able to crop them in the video. I wanted to have more and more orange on the screen. I also made few color corrections (more red please !) on some images.
I tried to give different length to the clips, but I wasn't satisfied. Therefore I decided to look for a soundtrack on jamendo.com. I used one called... Orange by Corde ! I simply keep the beginning and the end of the track and made them match.
For the word "Orange", I used a font called "Kilogram" that reminds me the "A Clockwork Orange" poster. I added several 2 frames-long white color mattes to create the effect.
Video Orientation
Image : Canon 600D | Audio : Zoom H4nPro | Light : Sun through a window
Credits:
Created with images by coyot - "lens camera camera lens"