This project was complex, multi-faceted, and we were held to the highest standards. Our task:to build a PVC air cannon, capable of firing a tennis ball over 200 feet, as well as making a plywood base that would allow the cannon to turn 90 degrees either direction and raise the cannon up to 75 degrees. We also programed an Arduino switchboard that gave a three, two, one countdown and actuated the valve of the cannon.
Our first task we were set with was to design something to stabilize our cannon to prevent torsion between the barrel and air tank, something that could destroy the integrity of our cannon, possibly creating leaks, or causing it to shatter completely. We went about this by using boxmaker.com to design a box in Onshape, then added holes in it that would fit around the barrel and tank of our cannon. Once it was designed in Onshape, we got a piece of wood and cut it out on the laser printer. We designed it with ridges on the edge to add stability, for without the ridges it would have been significantly weaker, and most likely would have broken.
Our second step was to program an Arduino circuit that would countdown and shoot our cannon. I struggled with understanding how the programming worked, but worked to build the hardware (eg. wires and LED lights). We spent about a month on this step, largely spent learning how the Arduino works. We spent the majority of the month building a total of 12 premade circuits, which helped us understand the flow and workings of the Arduino. Once all 12 circuits were made, Drew wrote the program that would actuate the valve and count down, primarily due to the fact that he was the only one of us who actually understood Arduinos at that point in time.
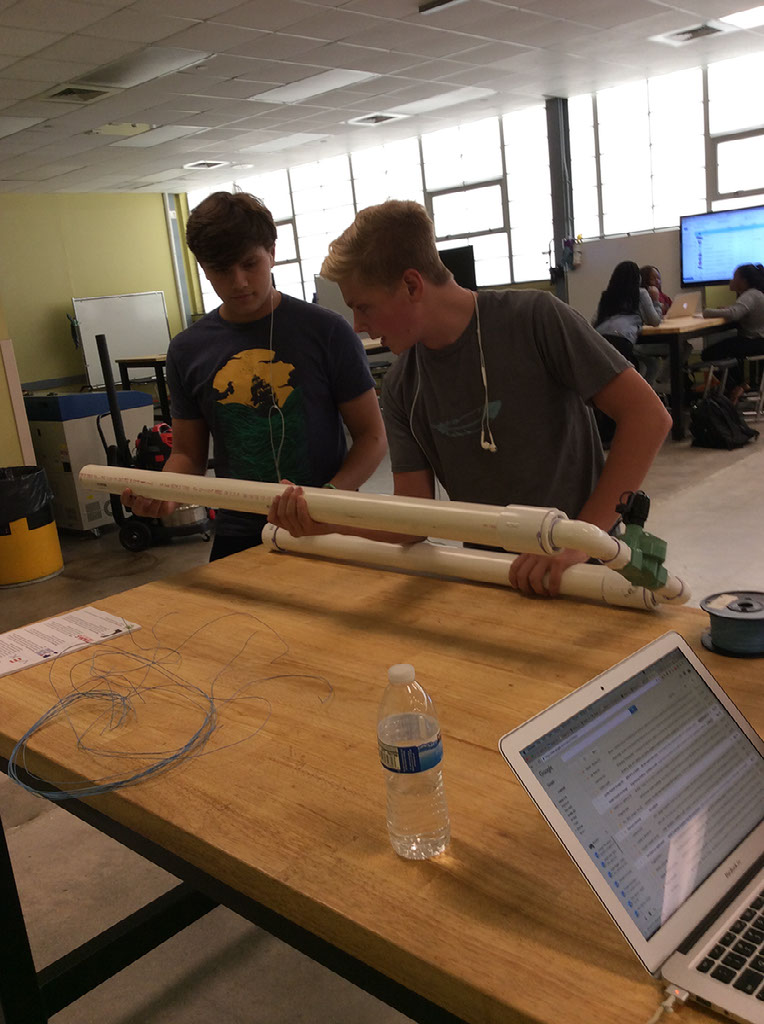
Our next task was to build the actual cannon. We spent about a week on this, learning how to use PVC cement, Teflon tape, and how to cut and work with PVC. I carried the brunt of the work for this part, because my partners seemed to have a tough time with the idea of "male" and "female" parts of the PVC, which forced us to start over more than once.
Our last stage in the design process was the longest:designing our base. Gavin and I took the helm on this step because Drew was working on the code still and Jakayla was helping him out. Gavin and I ran through about three ideas before sitting down with our teacher for half a class period and talking about thinking too big, and that the best idea was usually the simplest. With this new wisdom in mind, Gavin and I designed a base that would have full 360 degree rotation, but only three angles of elevation, because we decided it was best to keep our angle of elevation relatively locked, because doing so would help increase our precision. We figured that out because two factors affected our precision-elevation and PSI. If we can limit one of those factors, we can increase our precision.
After our base was designed, we had to cut it out. We did this with a CNC ShopBot, a drill that was attached to a giant printer. We could put our design in a program, then use the program to tell the ShopBot which way to cut, then press a button and come back half an hour later. Once our base was cut out and put together, we did some test shots, which revealed to us that the lack of something to hold the cannon to the base lead to the cannon jostling when we shot it, which meant that our precision was off. We then went back into Onshape one last time and designed some stabilizers that easily fit onto the backstop of our base, and held the cannon in place.
The last step of the project was to shoot the cannon. We did a series of tests, shooting three times and three different angles with three different PSI's. This gave us 27 points of data, which we could use to find the optimal angle and PSI for different shots.
We had one major outlier-the second shot at 45 degrees. This was due to a quick gust of wind that hit the ball as we fired, not due to something in our control
At 75 PSI, we were more consistent, but with outliers again at the 45 degree mark. I would guess that because the 45 degree shots went higher in the sky, the stronger winds up their threw off our shots.
This was our least consistent pressure, with up to 40 feet of variation in our shots, which is due to both high winds that day and the high PSI lead to lots of kickback on each shot, and therefore lots of shifting and jostling of the cannon in the base, which was not completely fixed by the stabilizers we built
In conclusion, I would say our project was a success, but not as good as it could have been. Though we did build a cannon and base capable of shooting a tennis ball up to nearly 200 feet, and were able to hit the target in a game we played, I think we could have done better. In addition to being material-inefficient, we had a big failure with the precision and accuracy of our shots because we didn't think to put stabilizers in our initial design base, something that could have made our cannon one of the best ones built. However, we did manage to have one of the higher scores in the game we played because we limited one of our factors. This allowed us to set the cannon at one angle and just fine tune the PSI, just like they did with the cannons used by Napoleon.