It was April 2012 when, after many years of discussions the Gestingthorpe History Group decided to recreate an early style updraft brick/pottery kiln. Gestingthorpe is a small village on the Essex/Suffolk border and historically there was a tradition of brick and pot making in the village going back hundreds of years, due in part to the availability of good quality brick earth which appears near the surface in many parts of the parish.
Through a generous donation of suitable land from a local farmer - we were able to utilise the natural contours of our site to start the excavations needed to begin building. The site offered a bank at the bottom of a gentle slope, with a south-west facing aspect which would be relevant as this is the direction of the prevailing wind - not only to take smoke away from the village but also to increase the draft into the firebox. Building the kiln into an existing bank also meant that we would have natural protection and insulation on 3 side of the structure (increasing its efficiency).
The site the kiln occupies is one side of a working wood yard (another reason why this site was suitable) and during our discussions the occupier of the wood yard was keen for us to utilise the non commercial wood (conifer and resin rich woods) that he is asked to remove from peoples gardens as a source of fuel to fire the kiln once completed.
Initial Discussions
18th April 2012 - discussions started on the best way to excavate the area using our mini digger which only has a limited reach.
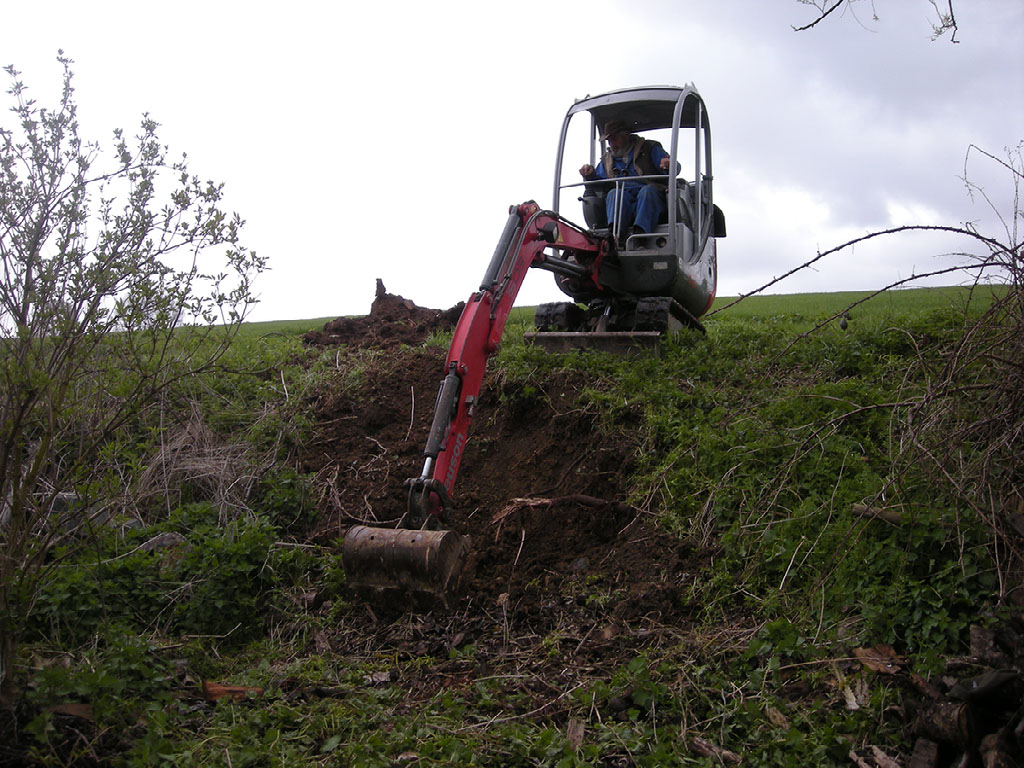
Breaking Ground
Our digger driver Tony begins to remove the topsoil and stinging nettles from the bank. Behind him you can see that the field rises away to the horizon in a north easterly direction (we are standing with our back to the south west). There are also very few properties that might be affected by the smoke produced when firing the kiln.
Without the use of a mini digger, it would have been hard going excavating the soil by hand - there were a number of thick tree roots and broken bricks left over from when there were agricultural buildings on the site. Here you can see Chris holding a yellow tape measure checking the dimensions and making sure we excavated a large enough hole!
Many years previously, the wood yard had agricultural buildings and a livestock yard associated with it - during the excavation we turned up a lot of old brick rubble and rotten wood from the 19th century structures that were once here. Never one to waste any building materials, all of the bricks and rubble would be re-used in the structure of the kiln later on.
Stratification
Here you can see the layers which have been built up over hundreds of years. Topsoil occupies about the first 2 feet of the surface, then a mixture of orange clay in the middle and finally a base layer of light chalk filled pale clay at the base.
It always surprised us how much material needed to be removed before we achieved the width and depth of hole we needed to accommodate the structure we had in mind.
Excavation Complete
The remainder of the excavation could be completed from this side once an area had been cleared in front of the bank to allow for the mini digger to gain access. Here you can see the 3 walls of the back which will help with insulating the structure.
Standing in the excavation looking south west into the wood yard. Piles of rescued bricks can be seen on the left. We had also cleared a lot of wood and shredded vegetation which would give us better access for the bricks and sand that we were going to need delivered.
Building Begins
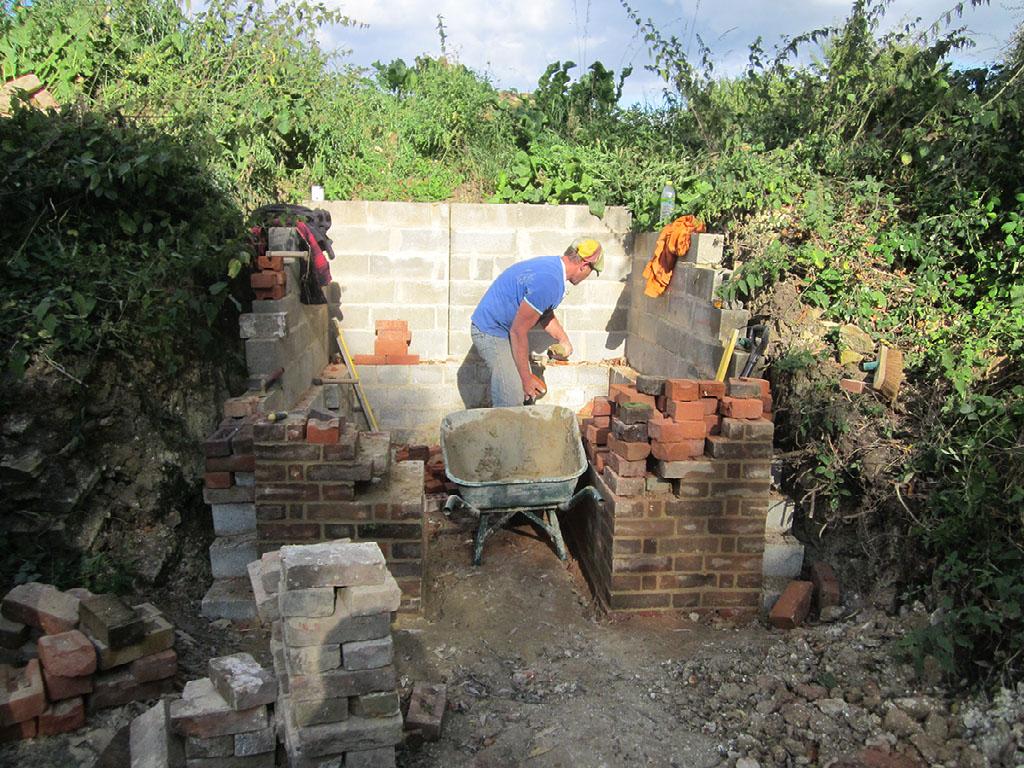
In the August of 2012, work was started on the retaining walls around what would be the kiln structure. Built straight onto the earth floor which had now baked hard in the warm weather, the walls are designed to hold back the earth which is naturally falling down the slope of the field above it. With the exception of sand, lime and some cement - all of the building materials used were donated or recycled from small deposits of bricks or blocks that villagers had in their gardens or scavenged from rubble heaps with the permissions of the farmers that owned them.
Laying out the Firebox
Here we are in late September and now that the retaining wall has been completed and has dried out we were able to begin the initial laying out of the firebox. The bricks were laid out on the ground in a 'banjo' shape so that we could work out the proportions before we committed them permanently. Once the shape had been confirmed, Mick began to lay the bricks onto the earth using cement to bed them in for additional strength. The long tunnel that you can see coming from the circle will be the firing tunnel that will channel the flames along to the firing dome.
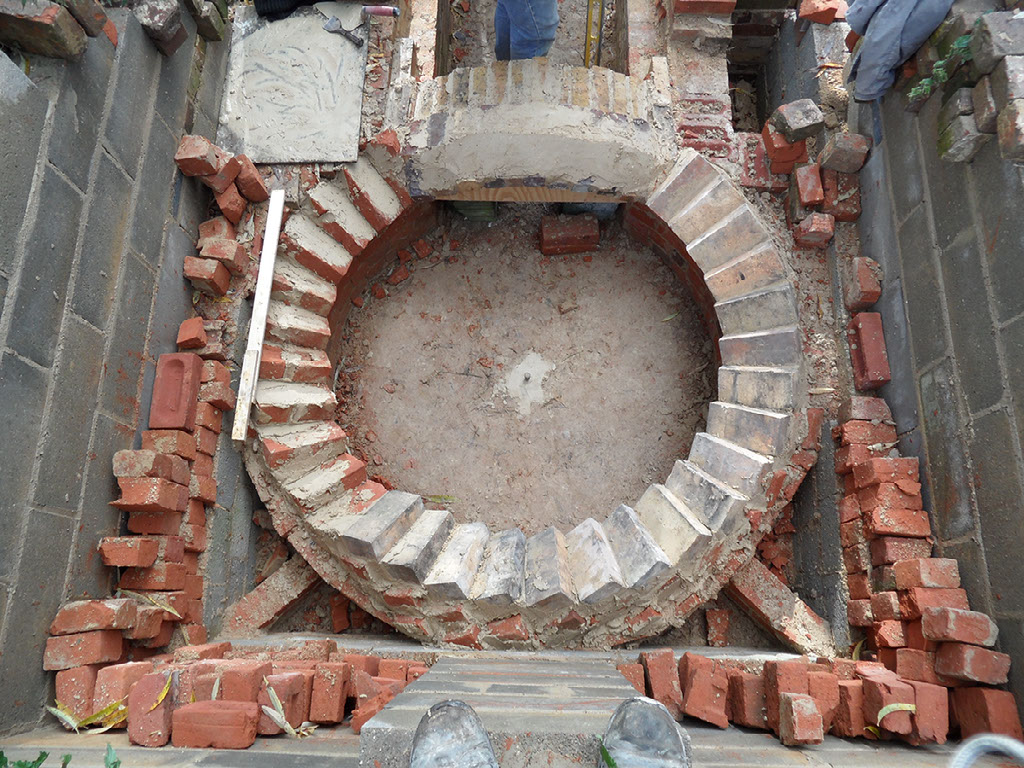
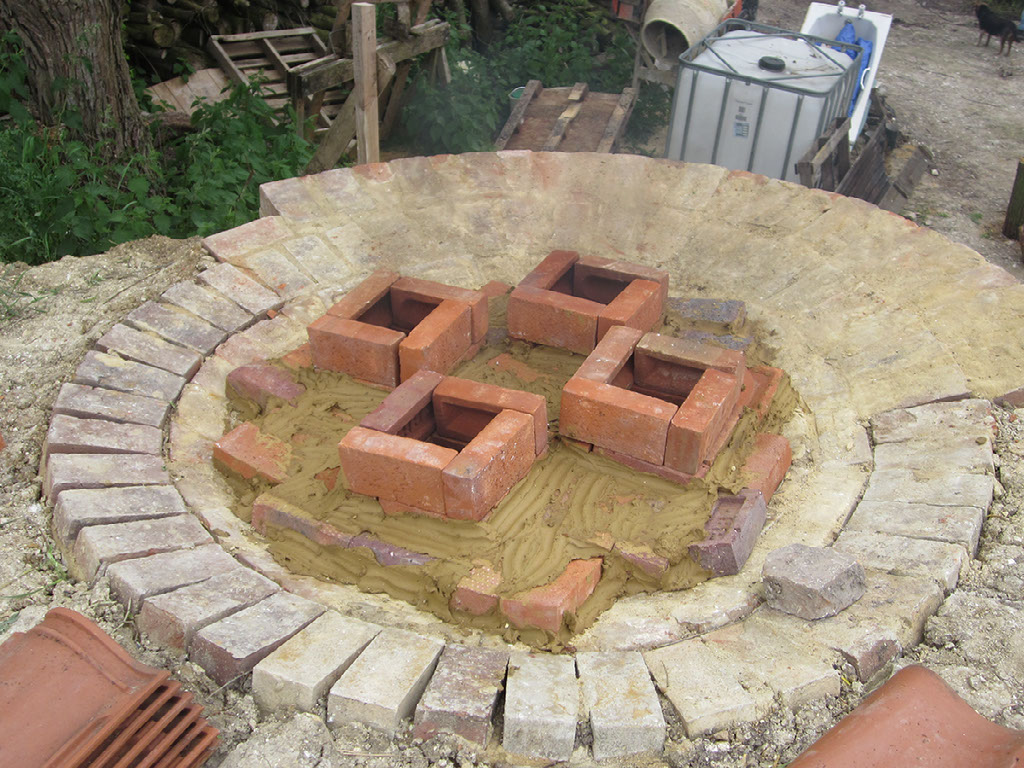
The Firebox
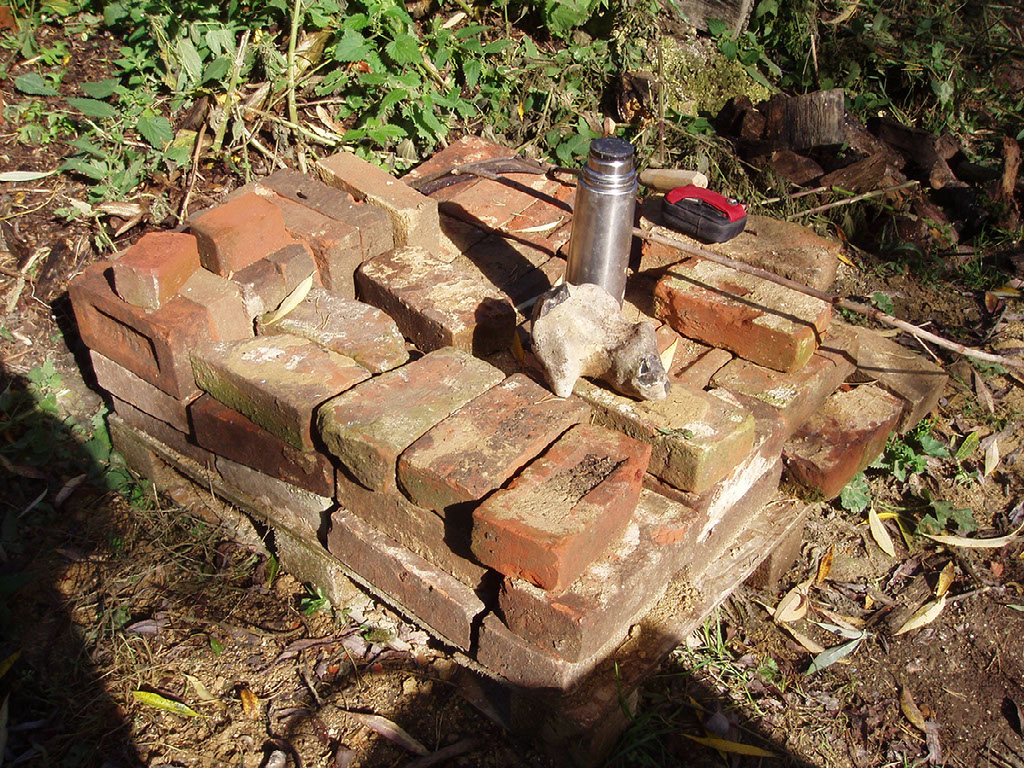
Here we see the layout of the firing dome and firebox. You'll also notice that we have used a lot of broken bricks which would normally have been destined for a rubble heap - of no use to anyone normally, we were able to make use of this free resource which would have otherwise been discarded.
NOTE: The pin in the middle (actually a chisel in this case) is the centre of the circle. This pin marks the end of a length of wood that acts like the hand on a clock. By always laying a brick at the end of the wood while the other end is touching the pin - you not only end up with a perfect circle but if you move the 'brick' end of the wood upwards as you lay each course of bricks, you also end up with a dome as each course reduces in size. This is called a 'floating trammel'.
An army marches on its stomach after all! - and laying bricks is heavy work. All of the bricks were loaded, unloaded, stacked, cleaned and laid - times that by a few thousand and there is a great deal of labour that went into building our kiln. Our thanks must go to Peter, Mick and Chris who's knowledge of bricklaying and heritage building techniques were invaluable.
Brick Piers
Here you can see the brick piers being built either side of the entrance to the firing tunnel. The firing arch will spring from each of these which will funnel the heat along to the firing dome at the end. They have been strongly built due to the stresses that the structure will undergo when it is being fired.
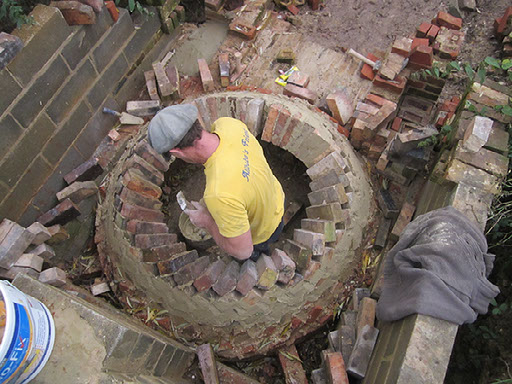
Firing Dome
Here you can see the base of the firing dome being built up. The areas in the outside corners will be filled with broken bricks and rubble once the wall is a little taller. The bricks are laid end on to the centre point as they will be subject to a lot of heat and this will prolong the life of the structure as the faces of the bricks eventually start to deteriorate.
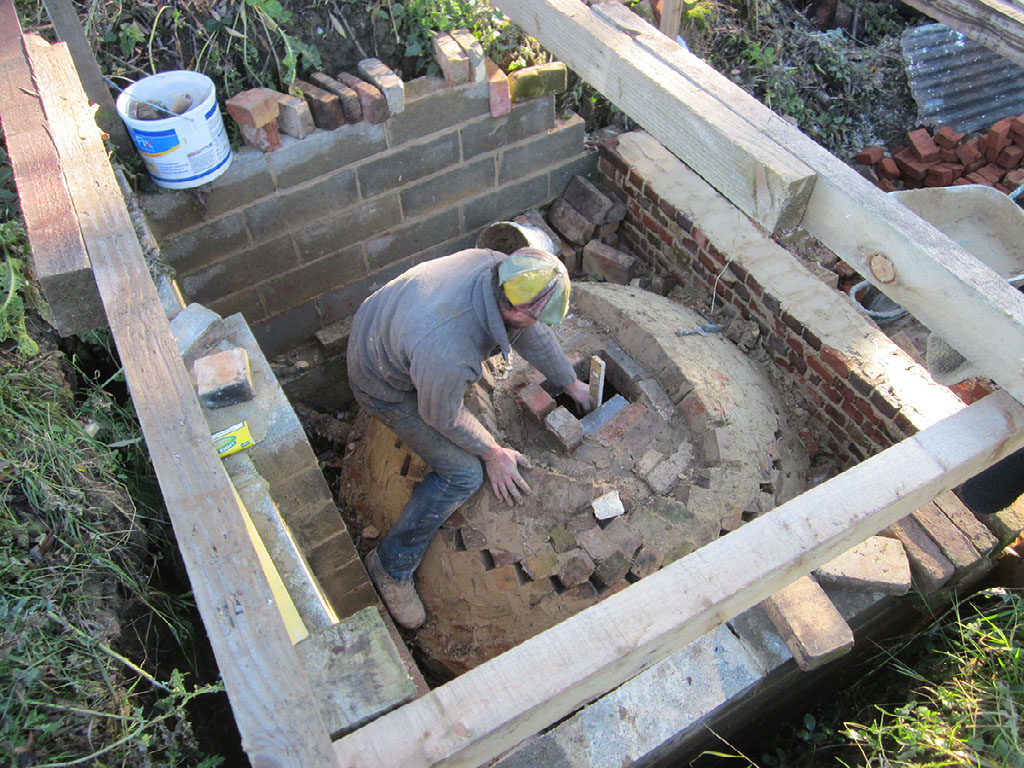
Raising the Walls
Here we are - still in September 2012 adding to the brickwork and raising the outside walls of the firing dome. We used the clay/chalk soil that was excavated from the bottom of the bank to make a clay 'slurry' that we could use instead of mortar on those parts of the structure where the additional strength was not needed. We also used Hydraulic Lime with sand as this would give a strong bond but is more flexible than cement.
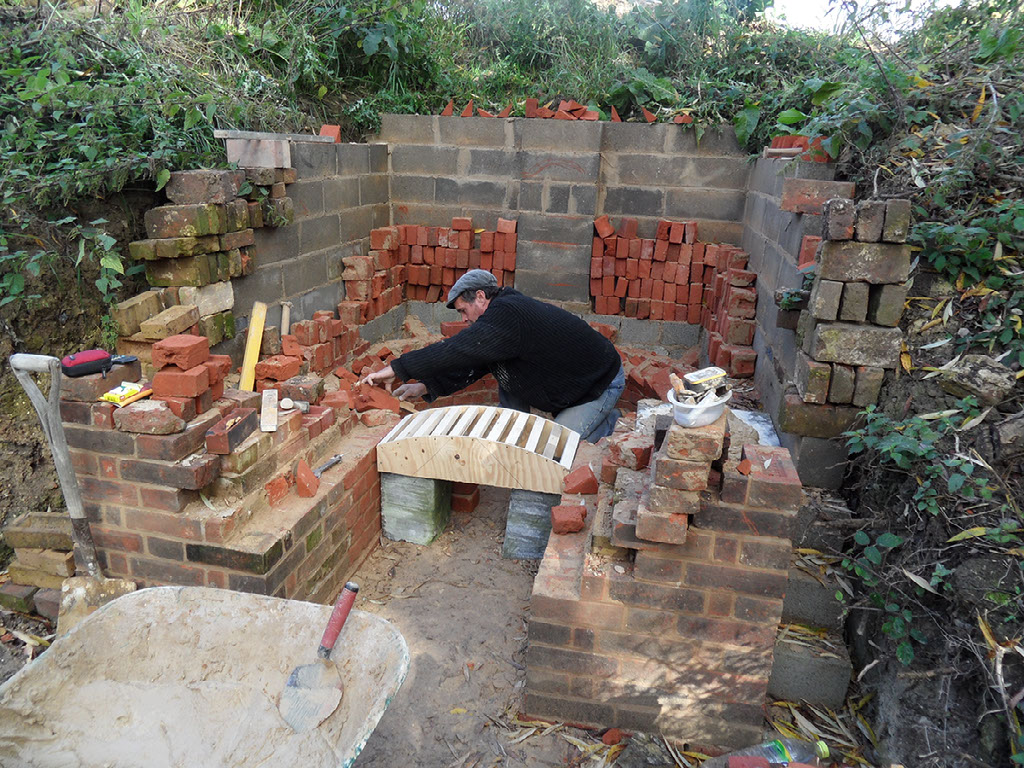
Dome and Arch
We're now into October 2012 and with 4 of us helping out, the walls are rising and a 'form' has been made by Chris which will support the arch while the bricks are laid over the top. We have also had a donation of old kiln bricks from The Bulmer Brick and Tile Company who are only 2 miles away on the edge of our border with the next village.
All of the old kiln bricks had been heavily attacked on one side by years of firing, but before they could be laid into our dome as much of these deposits would have to be removed so that they would fit together snugly. A lot of Anglo Saxon expletives and sore fingers later, we had clean fire bricks!
The Dome
You can see here that Peter has left a ledge that will be the start of the dome - from this point the bricks will start to curve over towards the centre. The bricks are laid on end and at a slight angle to help with support while the mortar is setting (this negates the need for support props). The trouble of course is that you end up with a triangle that needs to be filled on the first course of bricks - so say hello to a lot of cutting of wedge shaped inserts!
The Former
Here is the wooden former that was made to support the bricks that will be put into the arch that makes up the firebox tunnel. There is no stronger shape than an arch in brickwork and these can be self supporting once a former has been removed - we prefer to use a little sand and lime just to be sure!
Here a second course has gone next to the first on the firing arch and you can see Mick using the 'Floating Trammel' to adjust the bricks. Two hands make light work of extending the dome upwards (don't forget that all of this brickwork will never be seen when the structure is enclosed) - thank goodness I took some photos!
Completing the Dome
Eventually, of course - the dome will close in on itself and to prove its strength and to show the confidence in his work - Mick stood on top of it while the mortar was still wet - much to the amusement and disbelief of the few of us that were there to see it (sadly I didn't take a picture!).
Now in January 2013, we also decided to build a frame over the top of the kiln to keep the worst of the winter weather off the brickwork. It was also shrouded in hessian and tarpaulins to keep off the frost (lime mortar and frost do not make good bed fellows)
Once to top was closed in, selective bricks could be knocked out which would let the flames through and upwards to the chamber that would contain the bricks and pots. Below are images of the dome having a smoke test to check the draw. We didn't want to introduce heat at this stage as drying out the mortar too quickly would result in cracking - we were in January after all!
The Firing Chamber
The top of the dome now needed levelling and holes left in a circular configuration, this would then be the floor of the firing chamber. The circular wall that surrounds this floor could then be built.
Here you can see all the hard work removing deposits from the second hand firebricks was worth it, as they are now the inside course of our firing chamber. Note the hole in the front which we inserted a land drain pipe so that we can look into the heart of the chamber during the fire (we have subsequently found out that this was ill-placed as it is above the firebox and does get quite hot when you want to look in! Doh!)
Finishing the Arch and Firing Chamber
Below - you can see Mick completing the brickwork on the arch above the Fire Box. There will be another course of level bricks that will go across the top of this arch giving us a platform with which to work, load and unload the kiln.
Not content with 2 courses of bricks on the firing dome - another 2 courses are added end-on-end to the outside for strength and insulation. None of the joins in the bricks match up with the inner or outer rings of bricks so that in the event of cracking in the mortar it will not travel outwards and let heat out or cold air in. I think the wall of the firing chamber is about 2 feet thick at the front. Another land drain has been laid in the brickwork so that we can see in the chamber.
Completing the Firing Chamber
In what was some rather miserable weather with snow flurries and rain showers, Mick and Peter pressed on with completing the outside of the firing dome and finishing the brickwork. The structure had to be very carefully wrapped at the end of each day to stop the water in the lime and cement mortar from freezing which would have resulted in the join turning to sandy porridge.
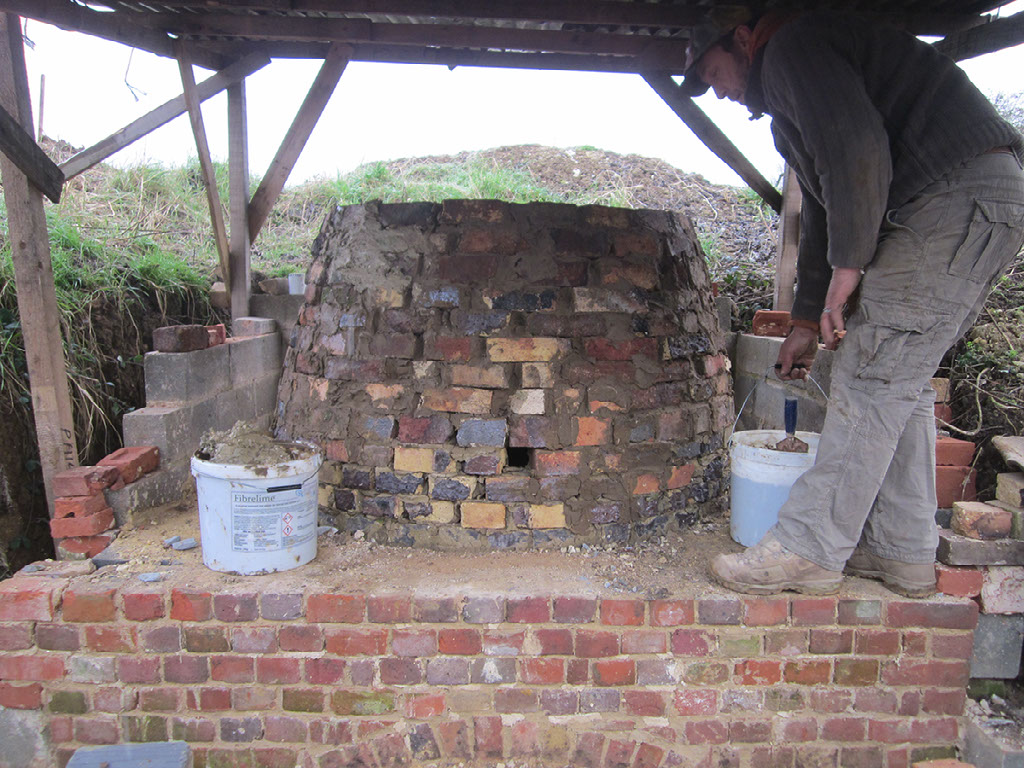
This photo and those following show how we introduced harder engineering bricks to the middle of the walls and then faced these with as many old and weathered bricks as possible.
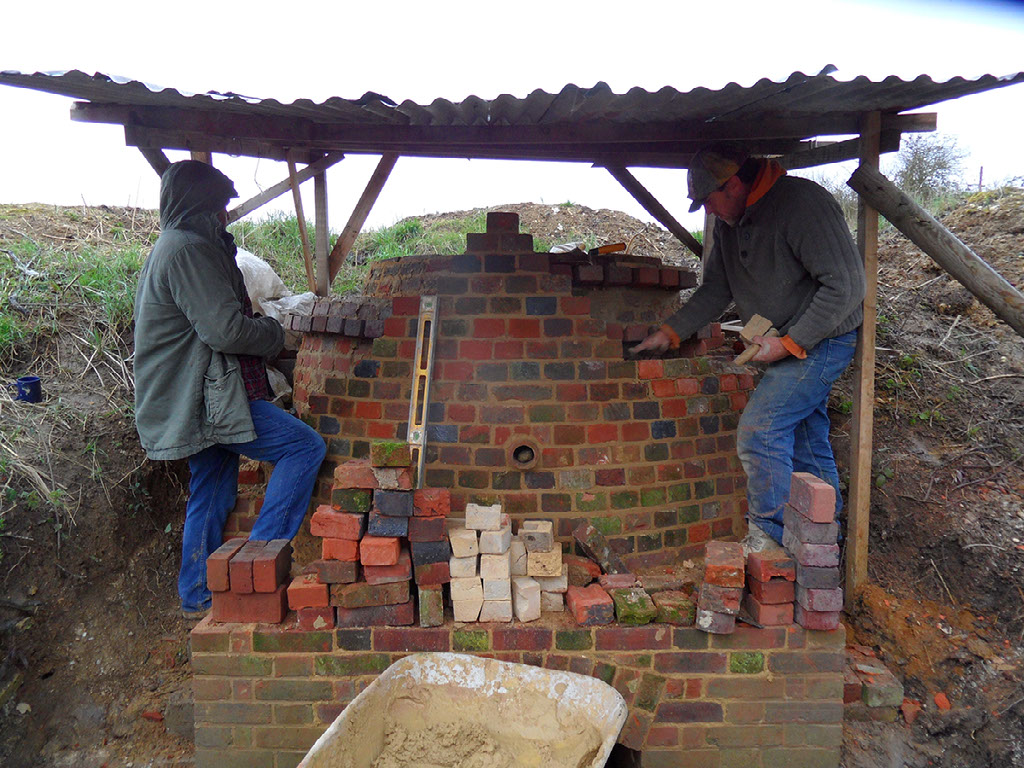
The skill of the bricklayer - not only laying in an increasing circle, but also with a gentle curve to the outside. Here you can see the make-up of the different bricks in the wall, there are soft reds on the outside together with a few white floor bricks as well as harder engineering bricks in the middle of the wall.
All Completed!
Hooray! The structure is complete - now we just have to protect it from the cold of a British winter!
Brickmaking
It was at this point we thought we had better start making something to put into the kiln! Thankfully Chris is a master brick mould maker and together with clay that was dug from our local ancient wood (less than half a mile away) we had the raw ingredients to start. With thanks to the Gestingthorpe, Wickham St Paul and Maplestead Women's Institute who generously funded the purchase of our Pugmill for grinding up the clay. We worked out that it was probably over 60 years since a brick had been throw in Gestingthorpe - before that there were probably hundreds of thousands thrown since the medieval period.
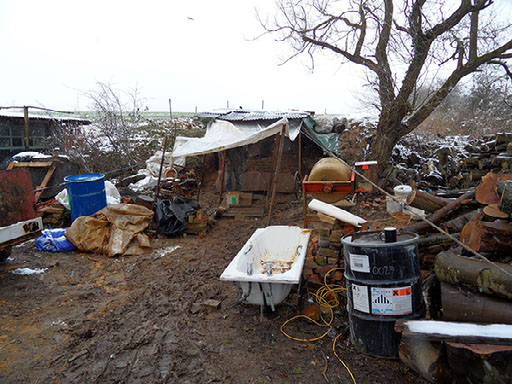
Taking off the Wraps
April 2013 not only saw us making bricks in the sunshine, but also taking the wraps off the kiln, removing the protective roof and burning a little brushwood to help to dry the inside of the chamber. The remaining gaps between the walls within the bank had the soil backfilled up against them once we had filled any voids with broken and unwanted bricks and rubble.
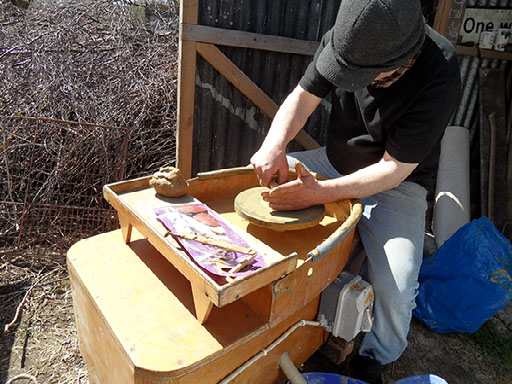
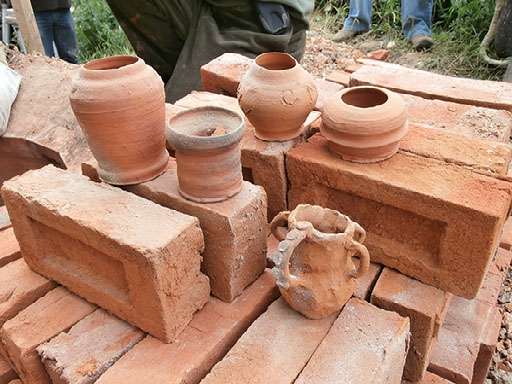
Basic Pots!
Through fundraising and generous donations from the Gestingthorpe Amenities Fund, we were able to purchase a basic electric potters wheel from a well known online auction site. After a lot of practice, turning large lumps of clay into very small vessels and the watching of many online videos of the professionals, we had made some very rudimental pots.
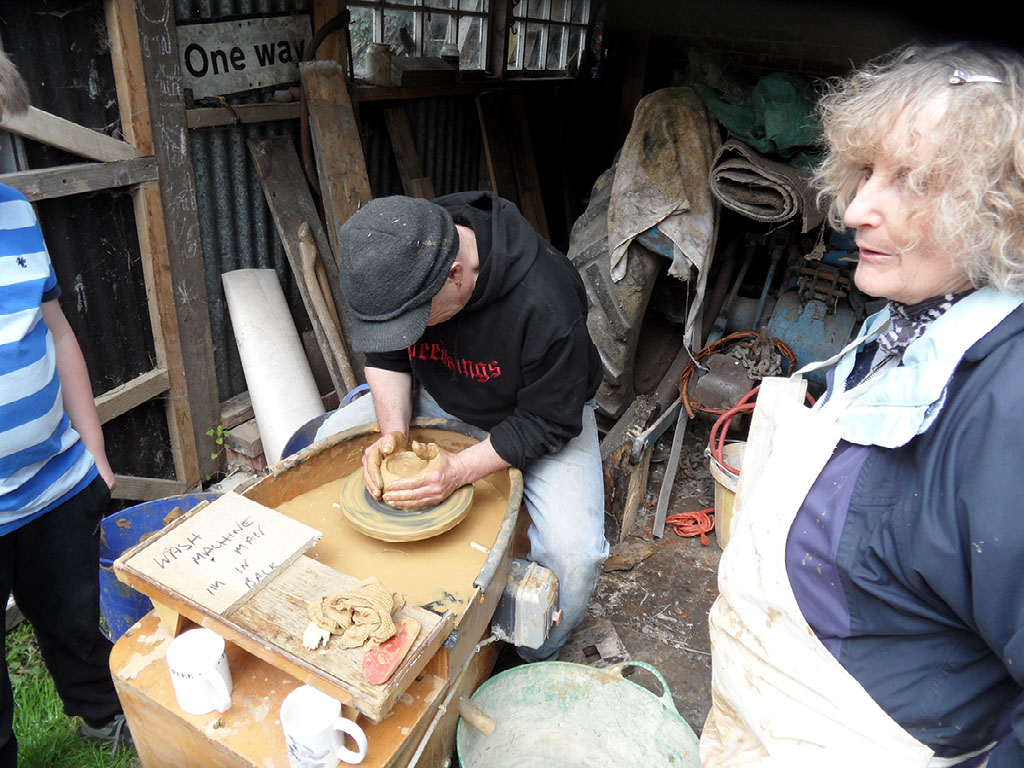
Practice, practice and more practice - it's a good job that the clay we use is a free resource! The professionals make it look so easy! At least the weather in May was nice enough to sit outside!
Easier Access
May 2013 also saw us cut steps into the bank so that we could get up to the top a lot easier, we would eventually brick these and put in a handrail. We also put a brick floor and corrugated iron sides in the firing pit to deal with the inevitable rain.
More Pots and Bricks
Throughout May and June 2013 we honed our skills at making bricks and basic pots in order to fill the kiln chamber. We would eventually need to add in some pre-fired bricks to help fill it as we were not sure of the capacity.
Loading the Kiln
To make remembering when we fired the kiln easier - and because here in the UK it is a significant date, our first firing was to be on the 21st June 2013 (the longest day in the Northern Hemisphere). The following pictures were taken a couple of days before this during the loading, the bricks and pots have now had a good 3 weeks drying time.
Because this type of kiln is loaded from the top, everything has to be stacked on top of one another. We achieve this by using bricks as our kiln furniture and create chambers that we can put pots by bridging over the top of them in a mini Stonehenge style construction.
We have to consider how tightly we pack the kiln, there has to be enough room for the flames to pass through the 'wares' - too tightly and the kiln will not draw the air through and is liable to overheat too quickly - too loosely and the heat will be lost and we will end up using a lot more wood.
Once the chamber was full, we laid a brick capping over the top and left 4 chimney holes (this configuration allows us to close off individual holes so that we can push the heat around slightly if one side is getting hotter than another). We have tried various configurations since but 4 seems to work the best for us. Any gaps were sealed with wet clay.
Tanning
Once the kiln was sealed we lit a small fire in the entrance of the firebox and let this burn gently for around 12 hours (this is called 'tanning') - the idea is just to warm the structure and wares and drive off a little of the moisture (we never got above 100°C (212°F).
Firing the Kiln
Here we are, June 21st 2013 - 14 months after we first started to dig out the bank and now it is time to fire the kiln. Will we use a lots of wood? Will it take 24 hours to reach 1000°C (1832°F)? Will the structure crack? Will the air draw through? Will the bricks and pots just fall apart?
All of these were questions we asked ourselves as we undertook that first firing. Watched by friends and family that had heard us talking about this project for years - the pressure was on us to get results!
When first starting to fire a kiln, we knew that we had to take is slowly - 100°C (212°F) per hour increase for the first 5 hours. Once the moisture has been driven off of not only the structure, but also the 'green' bricks and pots, we can start to stoke more vigorously and increase the temperature more quickly.
An Event
Our firings always have a very convivial atmosphere and we often have neighbours, friends or people who have come a little way because of an interest if what we are doing. Every firing is different due to the weather on the day, the type of wood we are using, whether that wood is dry or has a little moisture on it, direction of the wind or how the kiln has been loaded. All of these varying elements make for an exciting few days during and after the firing and we never know what results we might get.
Once the sun has set - the kiln takes on a whole new persona. The soft rumble of the fire through the firebox and chamber sound like a large animal breathing and the light being given off by the firebox and chimney stacks can be quite dramatic when you are stoking and trying to maintain and increase the temperature.
1000°C! (1832°F)
After only 14 hours of firing our pyrometric cone had bent over to tell us we had reached 1000°C (1832°F) - we had achieved our goal! Using half the amount of wood we expected and taken half the time allowed for - it is a testament to the builders of the kiln and the design that clearly makes it very efficient.
Unloading the Kiln
At the end of the firing, we covered over the chimney's and closed up the firebox, then began what felt like a very long 3 days to wait for the kiln to cool down. When we returned and felt the outside brickwork it was warm - the heat had travelled through 2 feet of brickwork and mortar to the outside walls and when we took off the earth covering the top of the chamber, it had been baked hard.
Conclusions
There are an infinite number of kilns, clays, firing techniques, pot styles, bricks or tile designs. We have only just scratched the surface with what can be done - our journey of discovery is just beginning. Sadly due to the demise of some of these crafts in the last century there is a great deal of information that has been lost and only through experimental archaeology such as we have undertaken with this project are we rediscovering techniques that were common place for hundreds of years before us.
With thanks to everyone who has been involved in this project, from supplying labour, raw materials, knowledge or cups of tea - without your combined enthusiasm for this project, it might never have happened.
For details of our subsequent 14 firings (as of February 2018) and other projects that the Gestingthorpe History Group have undertaken. Please visit our Facebook page for more information.
Copyright Gestingthorpe History Group 2018
Credits:
All photos remain the copyright of Gestingthorpe History Group.