Your dohicky is made up of three separate pieces of wood. The top piece has the cutout the middle is a spacer so the clay fits and the third is the back piece to give it a clean finished look. The spacer also has a hole in the center top for a jump ring
Now you just place scrap clay behind it. You'll want to make sure it's at least 1/8 thick, thicker is better. Start pushing it into the cutout being careful not to let the clay get to thin.
Give it a little role then start to trim it
Place the spacer on the back and give it a slight push so you can see where to trim. Or just eye it what ever works best for you.
Place the spacer back in making sure it now fits. The edges should line up and the clay should be entirely within the spacer . Keep trimming till you get that
Bad picture sorry. If the clay is above the spacer, almost always will be then leave the spacer in place and take your blade across it. Use the spacer as a guide.
You may want to continue to push the clay through. Just go back and forth till you like what you see.
If you need to trim the clay on your work surface instead of in your hand then place the spacer on the front so the clay you pushed through won't get squished. Hope that makes sense.
Place the back piece on just to make sure everything lays flat.
Place it in your oven and back according to your clays instruction. MAKE SURE YOU REMOVED ANY PAPER MASK. BE SURE TO TENT YOUR PIECE IF YOU DONT THE WOOD WILL BURN AND YOU WILL HAVE AN UGLY MESS
I did not want to wait for it to be cured to I am using a difrent piece. Add glue to the back. I place some around the clay to give it more bonding
Put the spacer on and then glue on this piece
Add your backing then work your piece to all the sides are flush. If you use to much glue it will slide so,it's something you have to play around with
All three pieces and the clay are a big sandwich now
I use tape to hold it togeather till it drys
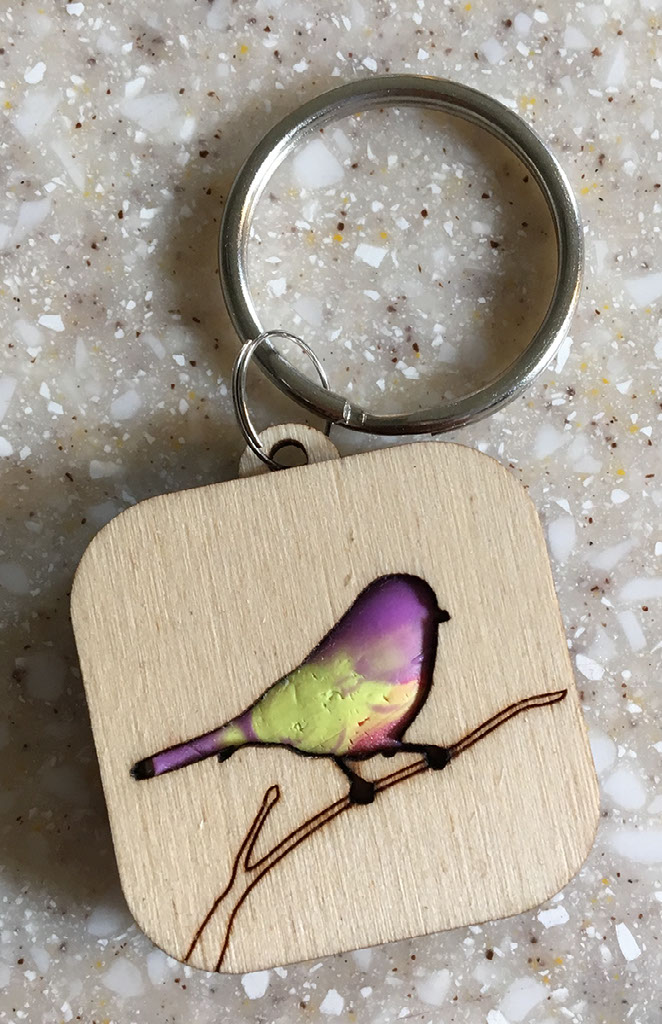
Add a jump ring and either key ring, necklace or ribbon depending on what your going to do with it. This one was not very good, the clay pitted, I was just playing. Others came out really smooth and nice.
Ok maybe to long but I'm tired and this is a first draft. Give a yell is something does not make sense . Take notes if you think of anything any way to make it easier. I. Want to simplify this as much as I can. Thanks guys. Have fun hope you make masterpieces.